Showing posts with label Theme - Packaging. Show all posts

Saturday, January 5, 2013

Pumpkin Spice January Blog Hop - Good Fortune in 2013


This is such an exciting day!   It is our January blog hop and we are kicking off  the newest challenge in town, the new Pumpkin Spice challenge!   The theme for our first challenge is “New Year’s”.  Hop a long with us to see the DT’s “New Years” projects.  After the hop, be sure to link up your New Year project at the Pumpkin Spice blog.

This year I have a few resolutions.  After losing 30 lbs. in 2012, I would like to lose at least 10 more pounds.  I want to try a new sport so I started fencing lessons last week.  Lastly, I want to try new things in my paper crafting.   This is where my project fits in.


2013-01-05 PSS Take out box WM

For my New Year themed project, I tried to do something a little bit different for me.   I used my Cricut and a SVG file to create this Chinese take out box.    Of course you can’t have a take out box with out something fun in it.

2013-01-05 PSS Take out box inside WM

My daughter and I made these paper fortune cookies to put in the box.    Instead of fortunes, the little slips of paper have jokes for the kids at the New Year’s Eve party we attended.

2013-01-05 PSS Fortune Cookies WM

They look so pretty made out of  the patterned paper from the My Mind’s Eye Honey Cake paper pad.  In fact, I like them so much that I think I am going to make them again for Valentine’s day using some of these papers.

So, do you want to know the joke that was the big hit with the under 12 set at the party?  Here it goes; I warn you it’s a groaner….    Don’t say I didn’t warn you.

Q:  Why do gorillas have big nostrils?   
A:  Because they have big fingers.    


Okay, I had better get you back on track for the blog hop.  If you get lost along the way, here is the complete list of stops on the hop.
Missy:  www.quickchickdesigns.blogspot.com
Tanya:  http://little-scrapper.blogspot.com/
Agnes (FLOWERDISCO): http://flowerdiscosscraphut.blogspot.com/
Cheryl (Shestamps): http://shestamps.blogspot.com/  (You are here!)
Heather: www.housesbuiltofcards.blogspot.com
Marlene: http://scrappincookie.blogspot.com
Court: http://www.courtscrafts.blogspot.com/
Carissa:  http://happilyeverpapercrafter.blogspot.com/
Saundra: http://luvscrappingtogether.blogspot.com
Lezlye: http://lezlyes.blogspot.com/
Denine www.pumpkinspiceblog.blogspot.com

When you finish hopping, don’t forget to share your New Year inspired project for your chance to win a prize for at least $25 retail.   You can link up your project and see all the details at the Pumpkin Spice blog.      

Happy New Year!   Thank you for hopping along with us.   Now head on over to the talented Heather’s blog.  I know she has something fabulous for you.

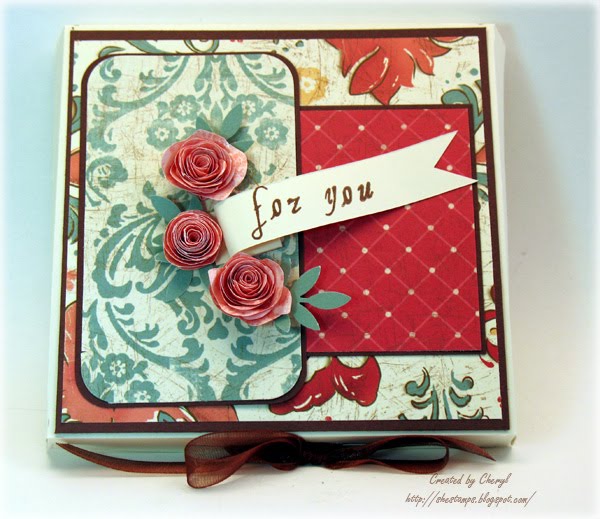
You can use these products from the Pumpkin Spice shop to create this project:  My Mind’s Eye Six by Six Honey Cake paper pad, 12 x 12 cardstock, ribbon

Supplies:
  • Stamps:   Mega Mixed Messages from Papertrey
  • Ink:  Close To My Heart Chocolate
  • Paper:  Paper Studio brown 12x12 CS, Bazzill Basics Blossom CS, misc. orange CS, My Mind’s Eye Six by Six Honey Cake paper pad
  • Tools:  Big Shot, Papertrey …. doilies & number dies, Sweet n Sassy hearts dies, Clear Dollar Stamp Designer label dies, Xyron, Scor-Buddy, SCAL software, Box Bonanza SVG file from Lindsay’s Stamp Stuff
  • Embellishments:  Hug Snug Seam binding, misc. glitter/flock, Hero Arts gemstones

Monday, October 24, 2011

Halloween Treat Bags

I just have a quick project to share with you today. I wanted to make up a few Halloween treat bags. I had these black lunch style bags from my blogging friend Maria of Crafty Cre8tions that I wanted to use.

Since I only had a little bit of time, I wanted to try to put together something relatively quick. I had these cute clip art images from Dover Publications that I printed out. (You can sign up on their blog for free, weekly samples.) I also used some doilies, embellies, and papers scraps that I had laying around my craft room. I added a Vintage Halloween Label from Lindsay’s Stamp Stuff. With the shading on the image, it was a snap to color these and cut them out using Nesties.

Don’t forget you still have time to enter the Halloween challenge at Sentimental Sundays.

Thank you stopping by! Have a great day!

Supplies:

  • Images: Vintage Halloween Clip Art from Dover Publications, Vintage Halloween Labels by Lindsay’s Stamp Stuff on Mygrafico
  • Papers: Echo Park Apothecary Emporium, Georgia Pacific CS
  • Inks: Distress Inks in Antique Linen & Tea Dye
  • Tools: Big Shot, Spellbinders Nestabilities, Copic markers
  • Embellishments: misc. doilies, twine, buttons, brads, plastic spiders etc.

Challenges:

Monday, December 20, 2010

Lindsay's Stamp Stuff Treat Jars

I have an extra Lindsay's Stamp Stuff project to share with you this week. You may remember the altered canning jar that I made for giving Sugared Cinnamon Almonds to my daughter's teachers, the mail man, and other people that I wanted to give a little something to. The jar I used for my initial idea ended up being a little big. This week end I altered 9 smaller jars to use instead. I followed my initial idea but made everything on a smaller scale.


I made 4 pounds of the Sugared Cinnamon Almonds using my Nesco on Sunday. The Nesco is large enough that I could do all of them at once. I am planning to make some treat bags to give out some of the rest of the nuts. (Or, at least that is the plan. I am running out of time and my nuts are some how disappearing!)


I didn't have a post for the Sentimental Sundays Challenge this week. The theme this week is "Inspired by Song". Join in the fun for your chance to win 4 digital sentiment sets & a custom signature and watermark from Raindrop Echo Designs. My project is inspired by song too - Santa Claus is Coming to Town. Doesn't it look like he is saying "You Better Not Pout" or "You Better Not Eat all the Nuts"?

Thank you for stopping by today!


Supplies:
  • Stamps: Christmas Potpourri Bingo cards by Lindsay's Stamp Stuff on shophomemade.com, Vintage Christmas Labels by Lindsay's Stamp Stuff on mygrafico.com
  • Papers & CS: Stampin' Up Dashing DP & Chocolate Chip CS, PTI dark chocolate CS, Georgia Pacific CS
  • Inks: Tim Holtz Distress Inks
  • Tools: Big Shot, Nestabilities, Designer Label Dies from Clear Dollar Stamps, Creative Memories circle punch, Copic markers
  • Embellishments: PaperTrey button twine, misc. ribbon & butons, small canning jars

Challenges:

Thursday, December 16, 2010

Linday's Stamp Stuff - Pretty Packaging & Sale Info

This week Lindsay challenged her DT to find ways to prettily package up Christmas/Holiday gifts. I used the chance to acquaint myself with the SCAL software I bought a while ago and have not used much. I have to admit was dreading getting to learn a new software program and was really happy to find how easy it was to use Lindsay's SVG files. I ended up cutting a stack of pillow boxes, gift card boxes and a ginger bread house box that I plan on decorating before the Holidays.

Today I am going to share 2 pillow boxes that I cut using the file from Pretty Packaging. Remember that if you do not have SCAL software, she also offers printable templates.

For my first pillow box, I just cut a plain box and then decorated it. I used some vintage sheet music that my friend Joy got for me this summer (Thank you Joy!). I love that it is green. I have been hoarding it but decided that I had better use it. I also used some lace and some rick-rack I bought at the Target $1 Spot a couple of years ago. Like those snowflakes? I just picked those up at Target. They called them "table scatters" and I love them. (I think my love of all things with snowflakes goes will with my snowman obsession.)


After making this pillow box, I was feeling pretty feisty and decided to try one using one of the cut outs that Lindsay included in the package. Easy peasy! Again I was impressed with how easy it was for a complete novice to use.


I adhered some transparency film that I had in my office on the inside of the box to keep the candy from falling out and decorated with some ribbon and charm from my blogging friend Maria. (Thank you Maria!)

Here is a looks at all the boxes you can make using Lindsay's Pretty Packaging templates.


If you missed the sale at Mygrafico.com last week, Lindsay is having a 25% off sale on everything in her mygrafico store through Saturday. Check out all the fun cutting files & templates in her store.


Thank you for stopping by today. Stop by the rest of the DT to see their pretty packaging ideas. Lindsay will have the weekly freebie available on her blog.

Lindsay Weirich (Owner & Stamp Designer)
Cindi Hooks
Diane Bove
Jennifer Bliss
Karin Martin
Laurel Seabrook
Leanne Garner
Margie Visnick
Micki Harper
Rhonda Walker
Shannon Neparko
Tamara Bennett
Tracey Allen

Supplies:
  • Cut file used: Pretty Packaging from Lindsay's Stamp Stuff on mygrafico.com
  • Stamps: PaperTrey Snowflake Serenade
  • Papers: PaperTrey kraft CS, misc. sheet music
  • Inks: Versamark
  • Tools: Heat tool, Circut,
  • Embellishments: Ranger clear embossing powder, PaperTrey bakers twine, misc. ribbon, rick-rack, buttons, snowflakes & charm

Challenges:

Thursday, December 9, 2010

Lindsay's Stamp Stuff - Sweet Treats

This week Lindsay challenged her DT to come up with some ways to package holiday treats. Since I am finally kicking my cold, I actually felt like I was able to create something. Believe it or not but it turned out how I pictured it in my head. That almost never happens for me.


I have to admit it was pretty easy to make this. Don't you love when a plan comes together. I could easily see making several of these for teachers, the mail man, etc. I did not tie the ribbon (which makes it vastly quicker and easier for me). I stuck it to the doily and the jar (recycled) using score tape. I then stuck it together on the left side where it comes together and looped/tied the bakers twine around it to hold it. Although you can't see it here, I used my circle nesties to cut a piece of coordinating cardstock and slipped it ontop of the metal lid but held in place with the ring.

You may be asking what the heck is in that jar? They are Cinnamon Sugar Almonds and they are AWESOME. I had to beat my husband off them with a spatula so that I would have enough to fill my jar. They are just like the ones you get at the fair in the summer. They have the added bonus of making your house smell WONDERFUL. And, best yet, they are EASY! A few minutes to prep, dump in them in the slow cooker (or I make 4 bags at a time in my Nesco) and then you leave them except to stir them for 2 hours. If you would like to try yourself, here is the recipe for the Sugared Cinnamon Almonds. I also like that the recipient doesn't have to eat them right away like a lot of the home made goodies you get. You can enjoy these in January with a cup of hot cocoa when all the cookies are nothing but a memory (and another dimple on my thighs.)

I love this Santa image. Doesn't he look like he is saying "Better not pout"? He is super easy to color because all the shading is already done for you.


Make sure you stop by the Lindsay's Stamps Stuff shop on mygrafico.com. Lindsay has been adding fabulous sets (digital stamps, digital paper, clip art, SVG files) like crazy. Remember that the clip art sets are wonderful for quick cards. Mygrafico is having a one-day only sale today. Everything is 40% off!


I'll leave you now so you can check out the sale and visit the other DT members to see what kind of sweet treats they cooked up for you. Remember to stop by Lindsay's blog to grab her weekly freebie.

Lindsay Weirich (Owner & Stamp Designer)
Cindi Hooks
Diane Bove
Jennifer Bliss
Karin Martin
Laurel Seabrook
Leanne Garner
Margie Visnick
Micki Harper
Rhonda Walker
Shannon Neparko
Tamara Bennett
Tracey Allen


Supplies:

  • Images: Nature's Christmas & Vintage Christmas Labels from Lindsay's Stamp Stuff (available on mygrafico.com) Christmas Potpourri Bingo from Lindsay's Stamp Stuff (available on shophomade.com)
  • Papers & CS: Cosmo Cricket Mitten Weather DP, Neenah Crest solar white CS, PaperTrey dark chocolate CS
  • Inks: Distress Inks Antique Linen, Tea Dye, Vintage Photo, Old Paper
  • Tools: Big Shot, Clear Dollar Stamps Designer Labels dies, Copic Markers, Score Tape, circle punch
  • Embellishments: Jenni Bowlin vintage button, PaperTrey bakers twine, misc. ribbon, doily, Tattered Angels Snow Queen glimmer mist, canning jar & treats

Challenges:

Saturday, October 16, 2010

Sentimental Sundays Challenge #25

The new Sentimental Sundays challenge is black, white & another color of your choice. Since my daughter was invited to a birthday party for a friend that loves cats, I decided to make a kitty card and matching gift bag.


Sorry the 2nd picture looks a little strange. The gift bag did not fit in my light box and I was in a hurry to get the photo taken so we could leave for the party.

The kitty image is from Pink Cat Studios and is already colored black so you only need to color the bird and the flower. I used digital paper purchased from Sweet Shoppe Designs. I love the black and white design. For other projects I have printed it on colored cardstock for instant DP that perfectly matches my CS. The gift bag is a cheap bag ($0.49 from Target). I like to keep several of these plain bags around to alter or to have on hand so I don' t need to run to Walgreens at the last minute for a bag. (Not that I procrastinate or anything...)

I hope you will join the Sentimental Sundays "Black, White & Another color" challenge this week. You are free to create any kind of project and use any supplies as long as it is a new project and it displays a sentiment.

Stop by the Sentimental Sundays blog to download the free sentiment set from Ann Vento of Raindrop Echo Designs.

While you are out surfing the web today, you might want to stop by Whimsy Stamps to check out the new digi's available from Raindrop Echo Designs. Ann has created some really great new autumn & Halloween sentiments and some new digis designed to work with Spellbinders Nestabilities. They are really cool.

Have a great day! Thank you for looking!


Supplies:

  • Stamps: Kitty & Sweet Bird from Pink Cat Studios, Flowers with Love from Annabelle Stamps
  • Papers & CS: Georgia Pacific CS, the Paper Studios black CS, misc pink CS, Out on the Town Again digital paper by Penny Springmann (Sweet Shoppe Designs)
  • Inks: Momento black
  • Tools: Copic markers, Fiskars edge punch
  • Embellishments: Misc gemstones, Hug Snug seam binding, misc. gift bag

Challenges:

Monday, May 24, 2010

Pizza for you!

Okay, maybe not a pizza, but a pizza box. I made this pizza box to hold the "Get Well" card I made for the Sentimental Sundays challenge. I am planning on mailing the card in a padded envelope but I wanted to add an extra layer of protection.


When I was practicing making roses (tutorial HERE), I made a few extra. I decided to use them on the box although they might get crushed in the mail.


I still have to clip the ribbon. I don't want to clip until I am ready to mail it in case I need to make any adjustments.


Have a great day!


Challenges for this card:


Supplies:

  • Stamps: Close to My Heart Amore Lowercase letters
  • Papers & CS: Close to My Heart Perfect Day paper pack, Stampin' Up Chocolate Chip, misc. cream card stock
  • Inks: Close to My Heart Chocolate
  • Tools & Embellishments: Cricut Tags, Bags, Boxes & More (sized W 11.6 x H 6.3 for 5x5 card), Creative Memories corner rounder punch, Martha Stewart leaf punch, misc ribbon

Monday, March 29, 2010

If Friends Were Flowers...

**Updated - This project won the Susie's Sassy Challenge - My Spring Garden.

This week our theme for Lindsay's Stamp Stuff (LSS) DT is Anything But a Card. When I saw the seed packs I bought sitting on the counter, I knew exactly what I wanted to do.


I used LSS's Pretty Favors to make this box which holds 2 seed packs. I hand cut the template and it was very quick and easy. I decorated the box with a paper pieced flower from the LSS Doodle Flowers digital stamp set and printed out a computer generated sentiment. (For a tutorial on paper piecing with a digital stamp, click HERE.)


I also wanted to make a package to hold a single seed pack. I cut a piece of CS 3-3/4 x 10-1/4 inches and scored at 5 inches and 9 inches to make the folds. It is held together only with the ribbon. I decorated it using the cute seed pack image from Love Grows Here. Below you can see how the seed pack slides out.

Either of these projects would be cute little gifts for teachers, friends, or even bridal showers.


Here are the previews of the LSS products used.


Please stop by the rest of the DT to see what kind of Anything But a Card projects they created.
Challenges for these projects:

Supplies:

  • Stamps: Doodle Flowers & Love Grows Here by Lindsay's Stamp Stuff on mygrafico.com, Stampin' Up All Year Cheer I
  • Papers & CS: Images printed on Georgia Pacific CS, Stampin' Up Certainly Celery, So Saffron, Bashful Blue, Rose Red, Cutie Pie DP
  • Ink: none
  • Embellishments & Tools: Pretty Favors plain box template from Lindsay's Stamp Stuff on mygrafico.com, Stampin' Up Markers, Swiss Dots embossing folder by Provo Craft, Stampin' Up Ribbon, Stampin Up label, tag & circles punches, misc. rick rack, eyelets, Cropadile, DMC floss, misc. button, black pen

Monday, February 8, 2010

Valentines Treats with Lindsay


This week Lindsay (of Lindsay's Stamp Stuff) asked us to make some cute packaging for some Valentine's Day treats. I made 2 projects using Love Grows Here. The first is a project that I did on my own and the second is a project that I made with my 8-year old daughter.

I designed this box myself using Spellbinders Label One die for the top and bottom and using strips of paper to make the sides. Once I got my head wrapped around it, it was pretty easy and made a cute little box. I will put the details at the bottom of this post if you are interested. I used my Cricut to cut the heart and the "4" and "U" and paper pieced the little bird.

My daughter also wanted to make some Valentine treats. I already had an idea of what I wanted to do, but I thought I would let her do it to gage how easy it would be for a kid to make. Overall, I would say pretty easy with help from a parent to help with the printing and cutting. DD was able to trace the templates, cut, color and assembly mostly on her own.

To make the bag topper, I printed out 2 copies of Lindsay's printable recipe template from Recipe Digital Stamp set (at 65% & 63% of original size) to use as a template. (It is folded over the top and is just straight on the back.) I picked these sizes because they fit my little bag. You could also use almost any one of the Nesties label dies that you have, but I wanted to give it a go with out using Nesties just to see what I could do with out them.

The circle tag was a freebie from Lindsay's blog. (And, in case you were wondering, yes, this is for Troy Bolton. If you have daughters you probably know who that is. If not, trust me you are not missing much. I wonder if he is going to show up to get his treats?)


I hope you enjoyed my projects and have a very Happy Valentine's Day. Remember, if you want the instructions to make the little box, stick around and read them at the very bottom of the post.

Please stop by the rest of the DT to check out their projects.


Challenges for Treat Box:
All that Scraps - Valentine Packaging
Charisma Challenge - #5 I love you
C.R.A.F.T. challenge - #36 Love/Valentine
Crazy 4 Challenges - C4C23 Be My Valentine
Creative Card Crew - #44 Valentines
Cute Card Thursday - #98 Dots & Spots
Dare U 2 Digi Stamp - #30 Hearts & Valentines
Fussy & Fancy - #3 Hearts
Lexi's Creations - #7 Spotted or Striped
Lilli of the Valley - Valentines
PaperPlay challenge - Week 5 Love Notes
Polka Doodles - #5 Paper Piecing
Penny's Challenge - Valentine/Love
Pile it On - #5 To the One You Love
Raise the Bar - Hearts
Stampin' for the Weekend - Love is in the air
Stamp Something - Love Somethings
Stamp with Fun - #45 Hearts


Supplies for Treat Box:
  • STAMPS: Love Grows Here digital stamp set by Lindsay's Stamp Stuff at mygrafico.com
  • PAPERS & CS: Love Nest by My Minds Eye, misc. brown textured CS, white Georgia Pacific CS
  • INKS: none
  • EMBELLISHMENTS & TOOLS: George & Basic stamps Cricut cartridge, fiber, buttons, DMC floss

Supplies for Treat Bag:

  • STAMPS: Love Grows Here & Recipe digital stamp set, by Lindsay's Stamp Stuff at mygrafico.com, Valentine Tag freebie digital stamp set by Lindsay's Stamp Stuff
  • PAPERS & CS: Georgia Pacific white CS, misc red CS
  • INKS: none
  • EMBELLISHMENTS & TOOL: pop dots, Stampin' Up markers, small bag
Instructions for the Treat Box:

Stick with me, this is the first box I made on my own (with out a template or using my Cricut) and it was pretty easy. I will explain the best I can. I have some photos but they didn't turn out well. The lighting was horrible. Click the pictures to make them larger.

First cut out the shape you want to use for the top and bottom of you box. I used the 2nd largest die from Spellbinders Label One Nestabilities die set. Use sturdy card stock. To make the sides of the bottom part of the box, I cut a strip 1-1/2 x 11 inches long. I scored the long way at 1/2" on the side that will be inside the box. Then, scoring the short way across the strip, I scored the width at every 2-3/4". You will be creating the 4 corners of the box and have a little piece left over. It will look something like this picture.
I then clipped the score marks that would be in the corners at the bottom of the box so that the paper would fold easier.

I then used adhesive along the narrow bottom flap and attached to my box bottom. Use a strong adhesive so that it stays together. It will look something like this.

I cut and adhered a piece of DP to the inside to make it look nicer.

I then followed similar steps to make the top of the box. I cut a piece of paper that was about 1 x 11". I scored at 1/2" to make the strip that adheres to the top of the box. Then I scored the strip to make the corners at a little less than 2-3/4" so that it would slip into the bottom to put the lid on. I have to admit I didn't write down the exact measurements. (Sssshhhh don't tell any one but I hate fractions.)

I hope these instructions make sense to you. If you have any questions please leave them in the comments or you can email me using the addy in my profile and I will answer as quickly as I can.

Thank you for sticking with me for this long post!

Saturday, December 19, 2009

Santa treat holder


I was looking through my photos on my computer and realized that I never posted this project I made using Christmas Cupcake Wrappers digital stamp set from Lindsay's Stamp Stuff. The round box was cut using the Plantin SchoolBook cartridge from Cricut. The swirls were stamped in versa mark and then sprinkled with a combination of clear embossing powder and red glitter then heat set. (I did not have any heat and stick powder or a glue pad on hand.) The blue stripe paper was out of my scrap bin. The image was printed 4 times. One entire circle is on each side of the box and then Santa was colored, cut out, and mounted using pop dots.
.
Thank you for looking! I hope you have a very Happy Holiday season!
.
Supplies:
Christmas Cupcake Wrappers by Lindsay's Stamp Stuff
Plantin SchoolBook Cricut cartridge
Blue card stock & misc. scrap paper
Image printed on Georgia Pacific white card stock
Stampin' Up Seasons of Joy (for the Swirls)
Spellbinders Nestabilities
Clear embossing powder
Martha Stewart red glitter
Red ribbon
Stampin' Up Markers
EK Success snowflake punches
Liquid Applique

Monday, December 14, 2009

Christmas packaging with Lindsay's Stamp Stuff

This week Lindsay challenged us to design some Holiday packaging. I decided to make two projects with the adorable snowman from her Warm Winter digital stamp set. They coordinate with the last two projects I posted. You can see the greeting card HERE and the gift card holder HERE.


For the first project, I used a tin to package some yummy Bliss chocolates (possibly for my daughter's teacher). I'm sorry I can't remember where I got the tin but I have a whole box of them in the basement. :) I used some kraft colored shredded paper to hold the chocolates in place. I then made band for the tin using designer paper from My Mind's Eye. I mounted the snowman on some ovals and scallops cut with Spellbinders Nestabilities. I wanted to jazz it up a bit so I dug out a container of snowflake ornaments that I bought from Hobby Lobby. (24 snowflakes for $7.99 and then I got 50% off!) I am pleased with the results. I debated clipping the string off the ornament because I don't like the way it looks, but I want her teacher to be able to remove the ornament from the belly band and use it.

I then decided to try a Pillow Puff box. I used the same idea to jazz it up using one of the HL snowflake ornaments. I also added some ribbon and a button.

I am entering these projects in the Digital Tuesdays Challenge (DTC#36) which was to make a project inspired by a Christmas song. "In the meadow we can build a snowman....." Luckily, you can't hear me sing.


Here is a look at all the coordinating items I made using Warm Winter.

Be sure to check out all the cute digital stamp sets available from Lindsay's Stamp Stuff on MyGraficO. Lindsay is running a promo through 12-23-09. When you buy 2 sets, you get to pick 1 free. (You buy 2 sets and then type the name of the free set in the comments when you check out. The 2 purchased and the 1 free set must be from the Lindsay's Stamp Stuff store on MyGraficO.)

Please also take a moment to check out the projects created by the rest of the DT:

Cassandra

Jennifer

Joy

Karin

Kristen

Lindsay (Owner)

Nettie

Thank you for looking!

Supplies:
Warm Winter from LSS
My Mind's Eye Signature Christmas
Perfect Pillow Puff Template by Snooks & Boo
Snow flake ornaments from Hobby Lobby
Spellbinders Nestabilities
Wood button
Fiber (Ribbon, lace, hemp)
Prismacolor pencils & OMS
Stampin' Up Close to Cocoa ink
Sentiments from Papertrey

Friday, December 11, 2009

MyGraficO Customer Blog Hop - gift card holder


I decided to make a gift card holder using the snowlady image from Lindsay's Stamp Stuff Warm Winter digital stamp set. I love the snow couple from this set. Take a look at my previous post HERE to see how cute they look together.

The inside includes a pocket to hold the gift card and a white section on which I plan to add a personal note to the recipient.


If you just jumped into the blog hop, a complete list of participants can be found HERE on MyGrafico.

If you would like to see some additional Holiday packaging ideas using this cute set, please check back on Monday. Lindsay (of Lindsay's Stamp Stuff) challenged her DT to create some Holiday packaging and I have two additional projects in mind.
.
The Lindsay's Stamp Stuff store on MyGraficO has a sale through 12-23. Buy 2 digital stamp sets and you can pick one for free. Please enter the name of the free set in the comments section during check out. (This is only for the Lindsay's Stamp Stuff store on MyGraficO. Other stores may have other promotions.)
.
If you are looking to join a group of sister blogging stampers for inspiration and support, check out the Sisterhood of the Blogging Stampers (SBS #29). You can find more information HERE.
.
I hope you enjoyed my post and I am off to visit the rest of the hop members!
.
Supplies:
Warm Winter from Lindsay Stamp Stuff
Kraft cardstock by Papertrey
My Mind's Eye Signature Christmas designer paper
Spellbinders Nestabilities
Stampin' Up Close to Cocoa
Lace
Snowflake (distressed with StazOn Timber Brown)
Prismacolor Pencils & OMS
Sentiment from Papertrey