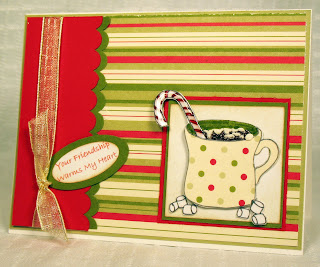
I love the cup of hot cocoa from the Lindsay's Stamp stuff Warm Winter digital stamp set . You can purchase from Lindsay's Stamp Stuff Shop at ShopHomemade where the everyday special is spend $5 in digital stamps and get a free stamp. I just had to use my chocolate scented embossing powder on the cocoa. Along with the liquid applique, it almost looks real!
While you are out surfing the web, check out Lindsay's blog. She has great ideas, tutorials and freebies. (Don't you just love freebies??!!) She also has links to the rest of her DT blogs so you can check out their projects.
I also used the Mojo Monday sketch (MOJO114) from last week. I did not get the card done in time to post for the sketch challenge but I still wanted to share it with you.
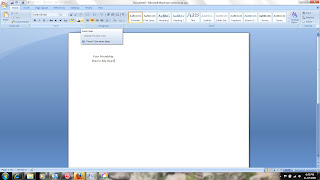
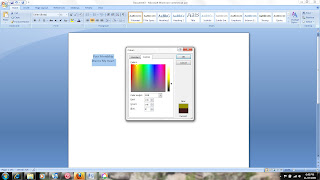
Following is a quick tutorial on how to match the color of your computer generated sentiment to your Stampin' Up or Close To My Heart Paper. It only takes a few steps in Word and it is well worth the effort. If the pictures below are too small to see, you should be able to click them to enlarge.
Follow these steps:

4) Click the "More Colors" option
 5) When the box opens, make sure you are on "Custom" and you can type in RGB (Red, Green, Blue) code for the color your desire. You can find most of the Stampin' Up RGB and many of the Close To My Heart RGB codes HERE on Splitcoast Stampers or you can also find a link in my side bar. In the example below, I typed in the values for Stampin' Up Old Olive. (Note, I changed to Real Red on my final card.)

6) Click "OK" and you are done. When printing, make sure you use a color printer. (I have accidentally printed in just black & white before).
If you have any questions, please feel free to email me at shestampsblog@yahoo.com. Please leave a link in comments to anything you make using this tutorial. I would love to see it.
Thank you for looking!
Supplies:
Warm Winter Wishes by Lindsay's Stamp Stuff
Stampin' Up Dashing Designer Paper
Stampin' Up Real Red, Old Olive and River Rock card stock
Ribbon
Chocolate Bliss scented embossing powder by Gelly Powder
Liquid Applique
Crystal Effects (on candy cane)

9 comments:
Thanks for posting something so useful and informative!
I love the polka dots on the mug! thanks for the tips!
you just blew my mind!!! I never knew that about the RGB and the codes on splitcoast ( just eyeball it) please share this with the yahoo group;) This is so clever!
love love this adorable card! hmm..now I'm in the mood for a cup of hot cocoa
:)
I love the rustic colors/feel of your card. It's so warm and cozy. Cocoa sounds really good...
Thanks for the tutorial. Love the paper piecing you did on the mug. Wish I could smell your project. It certainly sounds yummy!
Great tutorial. Thanks for all the time you spent on it and on the chart.
Love this card!! Very cute!
really pretty and thanks for tut!
Post a Comment