Monday, December 7, 2009

Snowmen Fall From Heaven Unassembled....

"In the meadow we can build a snowman...." kept playing over and over in my head so I decided I had to use this image from Lindsay's Stamp Stuff Warm Winter digital stamp set. Aren't they just the cutest couple? But after printing and coloring the image on Friday, my mojo left me and I really struggled with the layout of this card. When I woke up Sunday morning, I knew what I wanted to do. It's not exactly as I envisioned but I am happy with the results.

I wanted to work on another card but just ran out of time. It was kind of a crazy weekend. I was able to meet up with some girl friends for coffee and breakfast on Saturday, decorate the Christmas tree, and take a family trip to the Grand Geneva to see their Christmas decorations and vote on my favorite Gingerbread house. On the sadder side of things, my husband's grandmother fell and broke her pelvis last week and possibly suffered a stroke on Saturday night. We are waiting for more information and praying for the best.

I hope to have more Christmas inspired posts for you later this week.

Please take a minute and check out what the rest of the DT was up to.
Cassandra
Jennifer
Joy
Karin
Kristen
Lindsay (Owner)
Nettie

Thank you for looking.


Supplies:
Warm Winter digital stamp set by Lindsay Stamp Stuff

My Mind's Eye Signature Christmas
Paper Basics kraft card stock by Papertrey
Sentiment from Papertrey Made of Snow

Prismacolor pencils & OMS
Stampin' Up Close to Cocoa
Fibers
Wood button
Close to my Heart distressing tool

Thursday, December 3, 2009

Lindsays Stamp Stuff & My First Tutorial


I love the cup of hot cocoa from the Lindsay's Stamp stuff Warm Winter digital stamp set . You can purchase from Lindsay's Stamp Stuff Shop at ShopHomemade where the everyday special is spend $5 in digital stamps and get a free stamp. I just had to use my chocolate scented embossing powder on the cocoa. Along with the liquid applique, it almost looks real!

While you are out surfing the web, check out Lindsay's blog. She has great ideas, tutorials and freebies. (Don't you just love freebies??!!) She also has links to the rest of her DT blogs so you can check out their projects.

I also used the Mojo Monday sketch (MOJO114) from last week. I did not get the card done in time to post for the sketch challenge but I still wanted to share it with you.

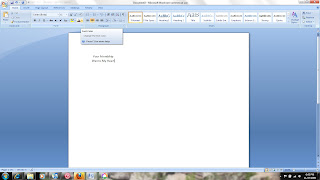
Following is a quick tutorial on how to match the color of your computer generated sentiment to your Stampin' Up or Close To My Heart Paper. It only takes a few steps in Word and it is well worth the effort. If the pictures below are too small to see, you should be able to click them to enlarge.

Follow these steps:


1) Open a new document Microsoft Word


2) Type in your text using the font / size that you desire.


3) Click the Font Color button.


4) Click the "More Colors" option


5) When the box opens, make sure you are on "Custom" and you can type in RGB (Red, Green, Blue) code for the color your desire. You can find most of the Stampin' Up RGB and many of the Close To My Heart RGB codes HERE on Splitcoast Stampers or you can also find a link in my side bar. In the example below, I typed in the values for Stampin' Up Old Olive. (Note, I changed to Real Red on my final card.)
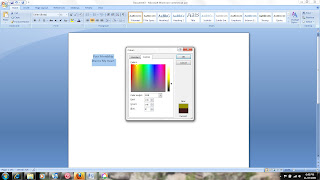

6) Click "OK" and you are done. When printing, make sure you use a color printer. (I have accidentally printed in just black & white before).

If you have any questions, please feel free to email me at shestampsblog@yahoo.com. Please leave a link in comments to anything you make using this tutorial. I would love to see it.

Thank you for looking!

Supplies:

Warm Winter Wishes by Lindsay's Stamp Stuff

Stampin' Up Dashing Designer Paper

Stampin' Up Real Red, Old Olive and River Rock card stock

Ribbon

Chocolate Bliss scented embossing powder by Gelly Powder

Liquid Applique

Crystal Effects (on candy cane)

Tuesday, December 1, 2009

Over the Top


Karin sent the "Your Blogging is Over the Top" award to me. I am new to blogging (both following and posting) so I was happily surprised to get this. I have seen it on other blogs and like reading other peoples' responses to the questions. I am going to send this on to some new blogging friends in order to learn more about them.


Here are the rules for accepting this award:
Answer the following questions using single word answers. (uh oh, not sure if I can do this but I will try.) Then, pass the award to 5 other people.
************************************************
Your cell phone? Purse
Your hair? Blond (mostly)
Your mother? Missed
Your father? Loved
Favorite food? Pasta
Your dream last night? Don't remember
Your favorite drink? Mocha
Your dream/goal? early retirement
What room are you in? office
Your hobby? fun
Your fear? Loss
Where do you want to be in 6 years? Here (with all my family)
Where were you last night? Home
Something you aren't? Thin (don't we all want to be thinner?)
Muffins? homemade
Wish list item? Craft room
Where did you grow up? Kenosha
Last thing you did? Laundry
What are you wearing? jeans
Your TV? Off
Your pets? Nutty
Friends? Wonderful
Your mood? Content
Missing someone? Mom
Vehicle? Yukon
Something you're not wearing? lipstick
Your favorite store? Target
Your favorite color? Green
When was the last time you laughed? about 15 minutes ago
Last time you cried? Laughed until I cried this past weekend
Your best friend? love her
One place that you go to over and over? Disney World
Facebook? yep
Favorite Place to Eat? Closed :(


The 5 bloggers I have chosen to pass this on to are:

Jennifer

Kristin

Lindsay

Shannon

Tracey

I hope you will all play along!

Monday, November 30, 2009

Monday with Lindsay's Stamp Stuff

This card was quick and easy to make using a snowflake from Lindsay's Stamp Stuff Warm Winter digital stamp set. Embossing using digital images is one of the hot topics on the crafting blogs lately so I just had to try it out for myself. I am happy to report that it was super easy. I printed the snowflake at 27% of size on glossy white paper. As soon as it comes out of the printer, sprinkle on your embossing powder (white in this case) and then heat using your heat tool. Easy peasy! The glossy paper gives you time to emboss before the ink dries. On regular card stock the ink dries too quickly to emboss using this method. Once the embossing was cool, I sponged ink on the white glossy paper to color it. You could print a whole sheet of the snowflake images then emboss and color them all at one time. What a great way to make several cards at once!


If you haven't tried using digital stamps yet, Lindsay has several freebies, including Christmas digital stamps, in the Lindsay's Stamp Stuff store on MyGraficO.


While you are there, check out her new Winter Printable Papers, Tags & Cupcake Wrappers . I have shown a preview, but you really need to see the larger pictures at MyGraficO to appreciate how easy it will be to make Christmas cards using this set.


If you are looking for inspiration on ways to use your LSS digital stamps, check out the Lindsay's Stamp Stuff group on MyGrafico. You can see projects posted by other people using LSS stamps and Lindsay has posted some great tutorials.

Now please take a moment to see the quick cards created by the rest of the DT.

Anette "Nettie" Robins

Cassandra Cushman

Jennifer Bliss

Joy Stagg

Karin Martin

Kristen Hamlin

Lindsay Weirich (Owner)

Have a great week!

Supplies:

Warm Winter Digital Stamp Set by Lindsay's Stamp Stuff

Stampin' Up glossy white & Ballet Blue card stock

Georgia Pacific white card stock

Stampin' Up Ballet Blue ink

Stampin' Up White Embossing powder

Silver Ribbon

Silver, self adhesive half balls from Michael's

Sentiment from Tree Trimming Trio from PaperTrey

Sunday, November 29, 2009

Crafting with DD - Christmas box


Here is a box made by my 8-year old daughter. She used my Cricut (with help) to cut the box, colored the image from Polly Craft, cut and glued it all together. She even asked to use the fluffy stuff (Liquid Applique) on the cuffs and wanted to sponge the edges of the image. Didn't she do a great job? Please give her some love.

Wednesday, November 25, 2009

Ho Ho Ho Hot Cocoa holder


After seeing Joy Stagg's tutorial on how to make a pocket card last week, I decided I had to try it. I made a pocket card/ hot cocoa pack holder and a matching card.

This image is a free coloring page from Elizabeth O. Dulemba. I love using her images for digital stamping. Digital stamps are so easy to resize. I reduced this stamp from a full page to the size you see here using Microsoft Word. Easy peasy.... (If you are not familiar with how to resize digi stamps in Word, send me an email at shestampsblog@yahoo.com and I will tell you how.)

Now if you notice that the embossing is only on the bottom of the card, that is a mistake. I was using my CuttleBug with some nesties (the way I have a zillion times before) and the handle was a little hard to push. I pushed on it a little and suddenly there was a big "bang" (I nearly jumped out of my skin) and the side of the CB fell off. I was stunned. I put it all back together, but it does not work properly now. There is only a little bit of pressure on one side. (I am kicking myself quite severely here.) Of course I am outside the warranty period. While I was feeling mad and miserable at the same time, I looked at the ever handy internet and found lots of people have had the same problem. While I still am not happy, I can rest my leg by not kicking myself quite so hard. My husbands says I should wait until Christmas to see if Santa brings me a new one, but I don't think I can wait that long. Hmmmm.... Hobby Lobby has a 40% off coupon this week.
.
Here is some other info from Linday's Stamp Stuff:
* On Thursday, November 26th, Lindsay's Stamp Stuff store at MyGraficO is having a 20% off sale on all her digital stamp sets. She has some really cute Christmas sets and even some freebies.
* Lindsay from Lindsay's Stamp Stuff is having a drawing for the digi stamp set of your choice from her store on MyGraphicO. Check out the details on my previous post HERE.

Have a very Happy Thanksgiving (USA) and I hope you get everything you need/want if you go shopping on Black Friday. I will be home surfing the 'net for deals and avoiding the crowds (and hopefully working on a project to post on Monday.)

Supplies:
Pressed Petals Christmas Theme #1211 designer paper
Pomegranate Splash card stock by Bazzil Basics
Olive card stock (not sure of manufacturer)
Stampin' Up Markers
Marvy Twinklette gold marker
Spellbinders Label One
Misc. cord
small pompom
Ranger Distressed Ink tea dye
Buttons
DMC floss (thru buttons only)
Hot cocoa packet

Monday, November 23, 2009

Monday with Lindsay's Stamp Stuff


I LOVE this wreath from Lindsay's Stamp Stuff Christmas Potpourri digital stamp set. Love it!
I had so much fun creating cards using this set over the weekend. Not only did I make this card, I also made the card you can see here along with a couple others I still need to get pictures of.

Remember, you can download Lindsay's Stamp Stuff digital stamps immediately at her shop on MyGraphicO or you can also find them at the Lindsay's Stamp Stuff Shop Handmade store where when you spend $5 you get a free digital stamp. While at MyGraphicO, you might want to join the Lindsay's Stamp Stuff group where you can see all types of projects people are making using Lindsay's stamps.

Please take a few minutes to see what the rest of the DT was up to.

Anette "Nettie" Robins
Cassandra Cushman
Jennifer Bliss
Joy Stagg
Karin Martin
Kristin Hamlin
Lindsay Weirich (Owner)


Have a great week!


Supplies:
Christmas Potpourri digital stamp set by Linday's Stamp Stuff
My Mind's Eye Signature Christmas designer paper
Stampin' Up card stock
Georgia Pacific white card stock (for printing the digital image)
Stampin' Up markers
Sakura Gelly Roll clear glitter pen
Stickles - diamond
CTMH ribbon
Stampin' Up oval punches
PaperTrey Holiday Treats ( for sentiment)
Spellbinders Labels 3